Did you ever imagine that you can install Windows Subsystem for Linux with a single command line? It is now officially available, using which you can easily install WSL on your Windows 11. This short tutorial shows students and new users how to install Windows Subsystem for Linux (WSL) on Windows 11.
Microsoft announced Windows Subsystem for Linux (WSL) back in 2016. Since then, the project has gone through several major updates and improvements. The latest versions of Windows 10 come with WSL 2.0 and are relatively easy to set up. With Windows 11, Microsoft makes installing WSL much easier.
On Windows 11, Microsoft simplifies the Windows Subsystem install process for Linux 2 (WSL) to only one command that downloads and installs all the required components, including the virtual machine platform and Linux GUI apps. You can now install the Windows subsystem for Linux with a few clicks and commands on the Windows terminal.
In this guide, you will learn simple steps to install the WSL platform on your device. In addition, we will outline the steps to update the Linux kernel in Windows 11. Also, the command installs the latest Ubuntu Distro by default. If you prefer another Linux distribution, you have the option to add a command to select another distro install. In addition to the new quick and easy process, a new command makes the kernel with just one command.
How to install Windows Subsystem for Linux on Windows 11
Previously, the process of installing Windows Subsystem for Linux was very complicated, including many packages. You need to work in multiple settings and install WSL on your PC. Microsoft has now simplified the process, and it’s just a command away.
You can only enter one command and let the command take care of the whole process of installing Windows Subsystem for Linux on your PC. You need an account with administrative privileges to join the Windows Insiders program on Windows 11.
To install Windows Subsystem for Linux (WSL) on Windows 11,
- Run Command Prompt as an administrator
- copy/paste the command wsl.exe –install and press Enter
- Restart your PC to make the installation ready for use.
To get started, open a command prompt with administrative privileges from the Start menu and enter the following command, and press Enter.
| wsl –install |
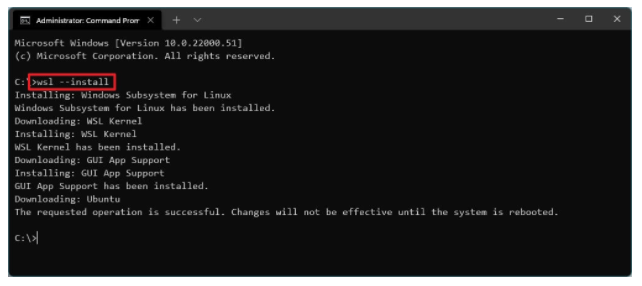
Now, the command will enable WSL and Virtual Machine platform components on your PC, excluding all manual steps to install WSL. Then, it will download and install the latest version of the Linux kernel and then the Linux distribution.
You will see the status in the command prompt window. When this is done, restart your PC to use the Windows subsystem for Linux (WSL).
It will take a few minutes to open WSL after the installation as it will have to decompress the files and save them on your PC. Once the process is complete, create a user account for your WSL. After that, you’ll be able to open it instantly.
Install WSL with the command
Microsoft has made this process much easier in Windows 11. You can enable the Windows subsystem for Linux and install Linux distributions like Ubuntu with one command. To do this, you need to use a command-line window with administrator permissions. We will do this with Windows Terminal, although you can simply turn on the command prompt.
let’s get started,
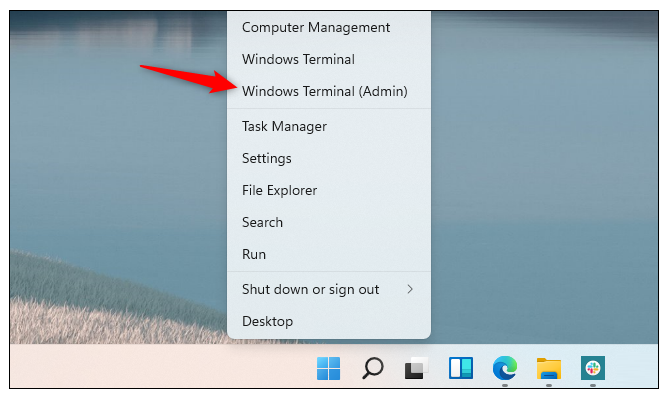
- To start Windows Terminal with administrator permission, right-click the Start button on the taskbar or press Windows + X and click “Windows Terminal (Admin)”.
- (You can also find the Windows Terminal shortcut in your Start menu – right-click on it and click “Run as Administrator.”) Agree to the displayed user account control prompt.
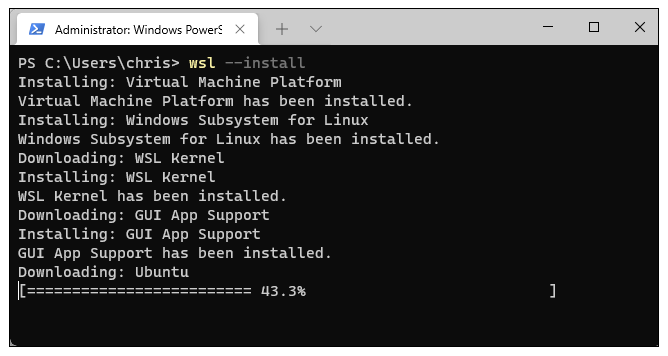
- To enable Windows subsystem for Linux and install Ubuntu, which is the default distribution, just run the following command:
wsl –install - When the process is complete, Windows will ask you to reboot your PC. Restart your computer. After that, you can use your Linux system. (You can right-click on the Start menu and shut down or Sign Out> Restart to quickly reboot.)
- To list other available Linux distributions, run the following command instead. These lists (-l) distributions are available online (-o).
wsl -l -o - You can install a Linux distribution of your choice by running the following command, replacing the “name” with the name of the Linux distro displayed in the “Command” column:
wsl –install -d Name - For example, to install Debian instead of Ubuntu, you would run:
wsl –install -d Debian
You can run this command more than once to install multiple Linux distributions on your system.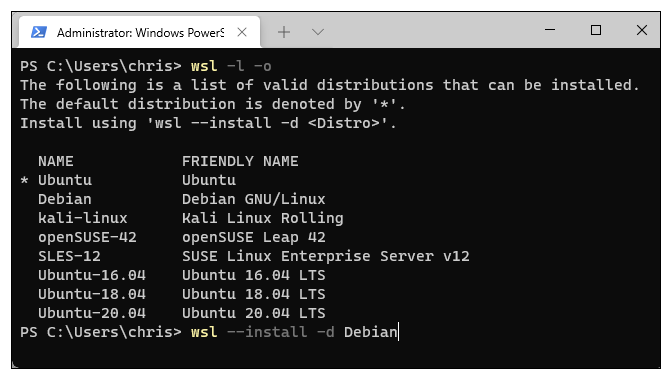
Once your computer reboots, you can start installing Linux Destro from your Start menu.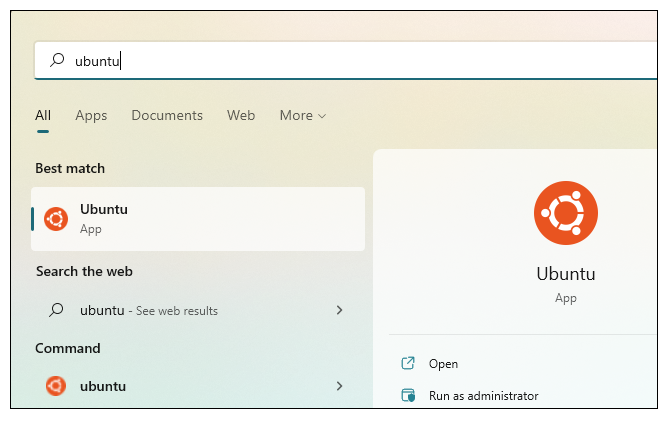
You’ll also find it as an option in the Windows Terminal app. Click the down arrow to the right of the new tab “+” button on the tab bar and select the Linux distribution that you installed.
Install WSL with specific distro on Windows 11
If you prefer another flavor of Linux, the WSL2 command includes an option to view and select a different distro. To install WSL with a specific distro in Windows 11, use these steps:
- Open Start Menu. Search for Command Prompt, right-click the top result, and select the Run as administrator option.
- To view a list of available WSL distros installed on Windows 11, type the following command and press Enter:
wsl –list –online - To install WSL with a specific distro in Windows 11, type the following command and press Enter:
wsl –install -d DISTRO-NAME 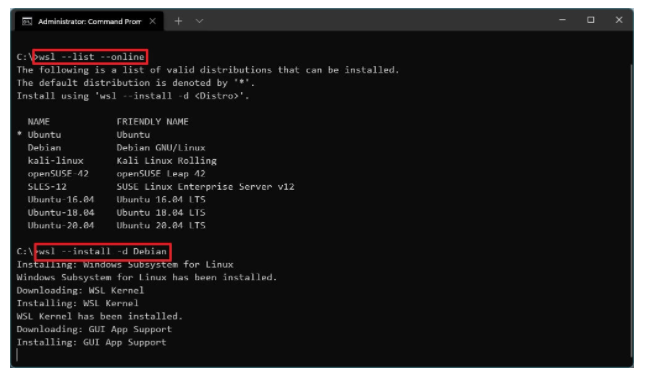
- Notice in the “DISTRO-NAME” command that the distro you want to install, such as Debian.
- Restart your computer to complete the WSL installation on Windows 11. Continue Linux Distro setup as needed.
- After you complete the steps, the Windows subsystem will be installed for Linux 2 components, including your default Linux distro.
How to see a list of available Linux distributions
In addition to the command to install Windows Subsystem for Linux (WSL) on your PC, there are several other commands that let you see a complete list of Linux distributions available for installation on your PC. To view them, open a command prompt with administrator privileges and type the following command, and press Enter:
| wsl –list –online |
This will show you a list from which you can choose a version to install using the following command, where you will need to replace the distribution name with what you see in the list.
| wsl –install -d <Distribution Name> |
This command will stop installing the default version of Linux distribution and will start installing the selected one. To view the Windows subsystem for Linux status, including configuration, distribution type, default distribution, general information of the kernel version, you can use the following command. It can also be used to install additional Linux distributions on existing installations.
| wsl –status |
It will display all the information about WSL on your PC.
How to manually update Windows Subsystem for Linux
There are commands that can be used to update or roll back your WSL Linux kernel and update the previous one. To manually update the Windows subsystem for Linux, type the following command at a command prompt and press Enter.
| wsl –update |
To undo an update to a previous version, use the following command.
| wsl –update rollback |
These various commands can be used to install Windows Subsystem for Linux (WSL) on your PC, see the list of available Linux distributions, update the updated WSL, or rollback.
These commands are not only usable in Windows 11, but if you are in the Windows Insiders program and have a preview build of Windows 10 OS (build 20262 or higher), you can use the command to get all of the above functionality in your Windows 10. PC.