Screenshots on your pc:
Well, You want a screenshot from your pc? Then windows operating system offers you plenty of methods to take screenshots. Sometimes you need rectangular shape screenshots, sometimes it could be freehand shots or the full windows shot. You can take screenshots however you like. It’s like a trick.
Computer tricks that makes you expert in computer:
If you ever search on google about learning new and updated computer tricks, then this article gonna help you. Few other sites on the internet showing different computer tricks. I don’t say they are all fault. All the article is well furnished. But there is a proverb has “The more you read the more you learn”. So, you better read more and more articles to learn more tricks. You may already visit a hundred sites and learned thousands of tricks. But think, what if the tricks I talk about in this article you don’t even know it? In this regard, I better wish you to don’t ignore this article. Here I’ll discuss a few ways of taking screenshots from your pc that you may didn’t heard before.
Why should you know about these ways of taking screenshots?:
Well, there is a very simple way of taking screenshots using your keyboard. But if you are a student of Computer Science Engineering, then you must know about some computer tricks, which your friends and family don’t know. If you don’t have any unique ideas about computers then what makes you different from a general student? Besides knowing more computer tricks makes you a more smart guy. Perhaps you didn’t understand what I’m saying. Well, let me clear you in more detail. Suppose, your friend doesn’t know how to take screenshots on a computer. What if you show him/her three or four different way of taking screenshots on computers? Pretty impressing, isn’t it? Here I’ll show you a lot of tricks for taking screenshots. Let’s start:
Different ways of taking screenshots on a computer:
You may know one or two ways of taking screenshots on your PC (Personal Computer). But here I’ll show you some other ways.
1-Taking screenshots using the keyboard:
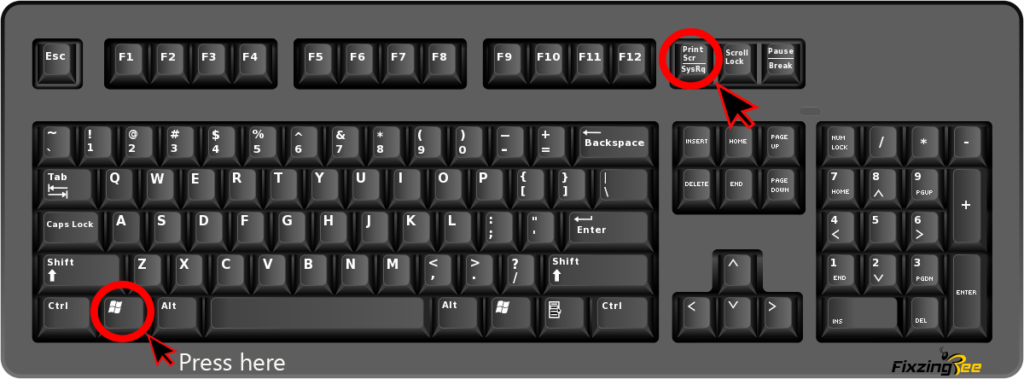
This is the easiest and well-known process to take a screenshot. Also, this is the quickest way to take screenshots. Just press and hold on the “Window” button and click on the “PrintScr SysRq” button. Remember different laptops and keyboards use the different names of these keys. This button name could be “PrtScr SysRq”, “PrtSc” etc. You have to identify this key.
Shortcut keys:- Windows button 🡲 Print Scr SysRq
2-Use the snipping tool to take screenshots:
This is the coolest way to take screenshots. Because you can take screenshots in four different modes. These are:
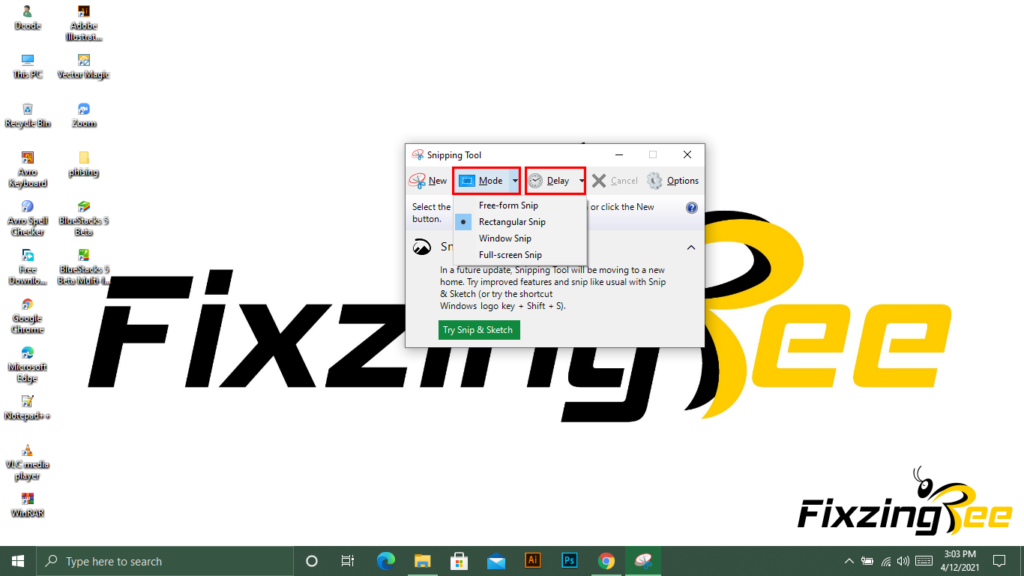
1- Free-form snip: You want a super-specific screenshot to take? Well, this mode gonna help you to take a specific shot. Select this mode and move your cursor freely.
2- Rectangular snip: By selecting rectangular snip you can take a rectangular screenshot.
3- Window snip: Window snip helps you to take a whole windows screenshot. If you select on the window it will take only the window if you select the menu bar then it will take a screenshot of only the menu bar.
4- Full-screen snip: You want a full-screen shot? Then this mode is for you. It will take the full windows screenshot.
Besides you can fix a specific time to take a screenshot in this mode. You can select “No delay” to “Five-second” delay. If you select the five-second delay the screenshot cursor will appear after five seconds.
Shortcut keys:- Windows button 🡲 Shift 🡲 S
How to use the snipping tool pictorial steps:
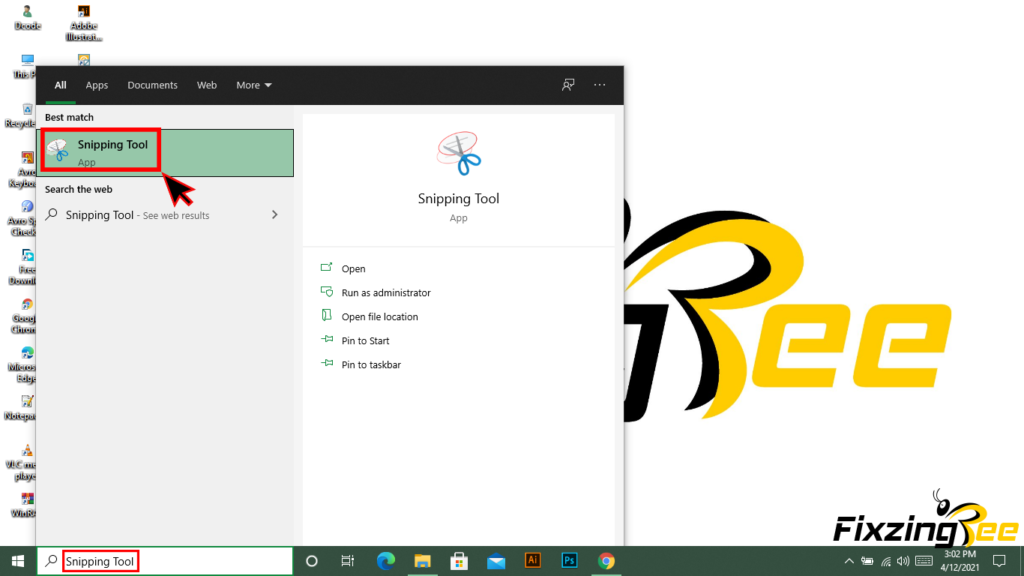
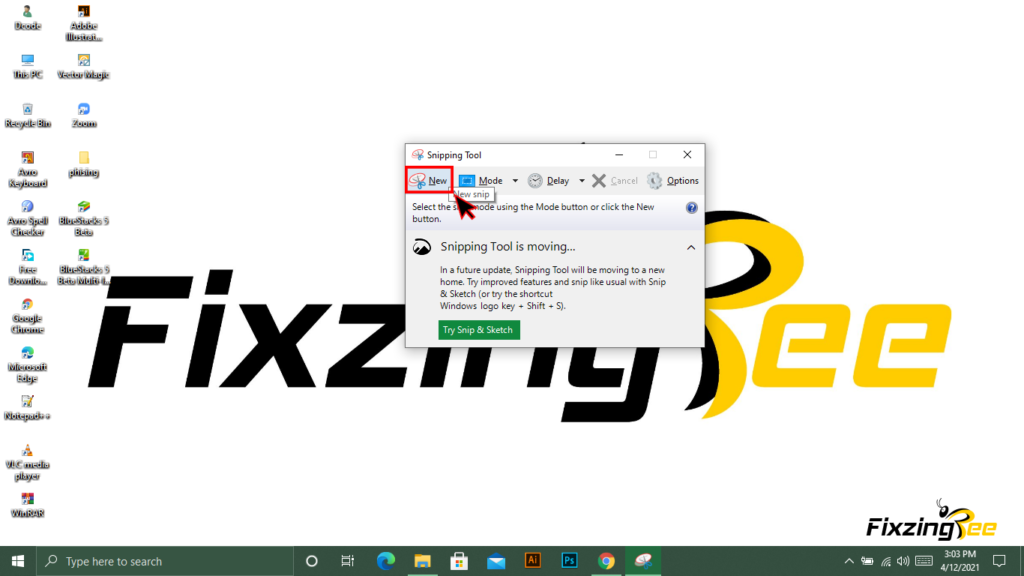
Step 1- Go to the search box near the window bar. Now search “Snipping tool” or use the keyboard shortcut keys.
Step 2- Now select a mode that I told you about before. Don’t forget to select the delay. For a quick shot, you better keep it as “no delay”. That wouldn’t take any time to take the screenshot. After selecting these options then click on the “New” option.
Step 3- After selecting these options then click on the “New” option. Then you will see that the anchor cursor turns into a pulse-type cursor.
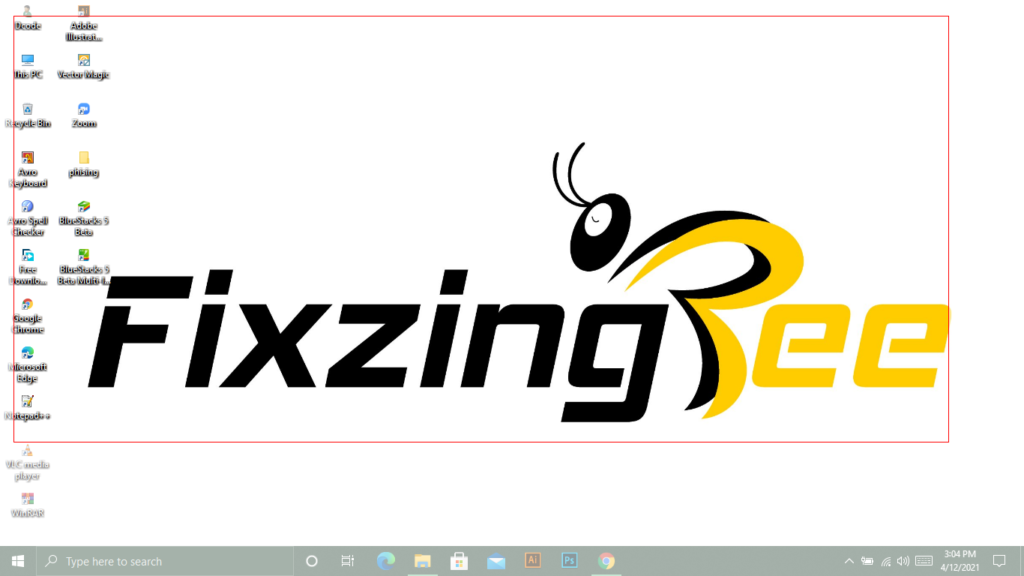
Step 4- Now move your pointer where you want to take a screenshot. I have selected the rectangular shape that’s why my option is rectangular. When you move your cursor you will see that the selection area is clear where the unselected area is a blur.
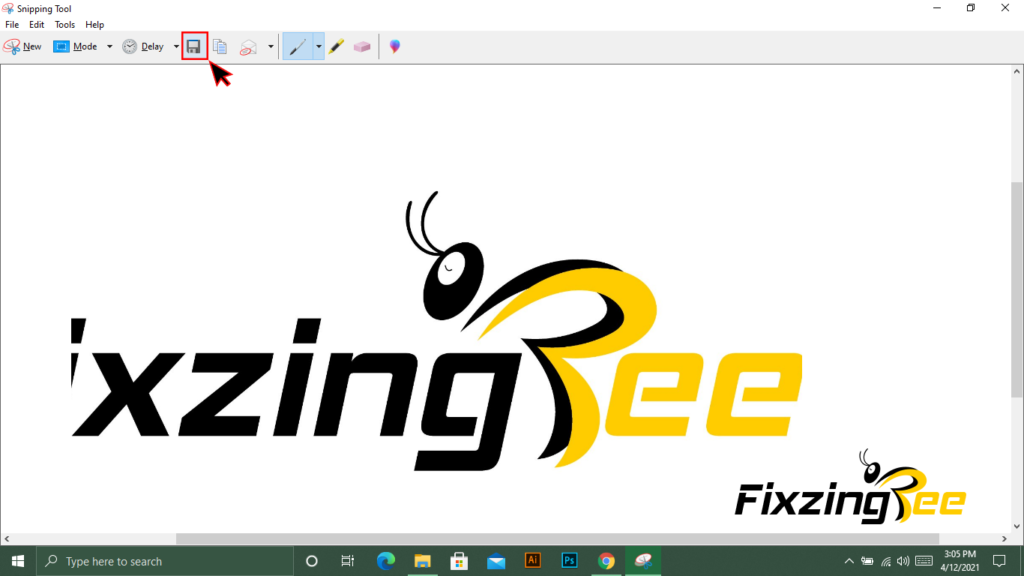
Step 5- Now simply save the picture and you are all done.
3- Take screenshots automatically:
This is the coolest of all processes and I am damn sure 90% of people don’t know about this method. Suppose you need a couple of screenshots to take. That moment if you use a snipping tool or the keyboard that would be very boring and wasting of your time. To eradicate this problem this automatic process going to save your time and energy.
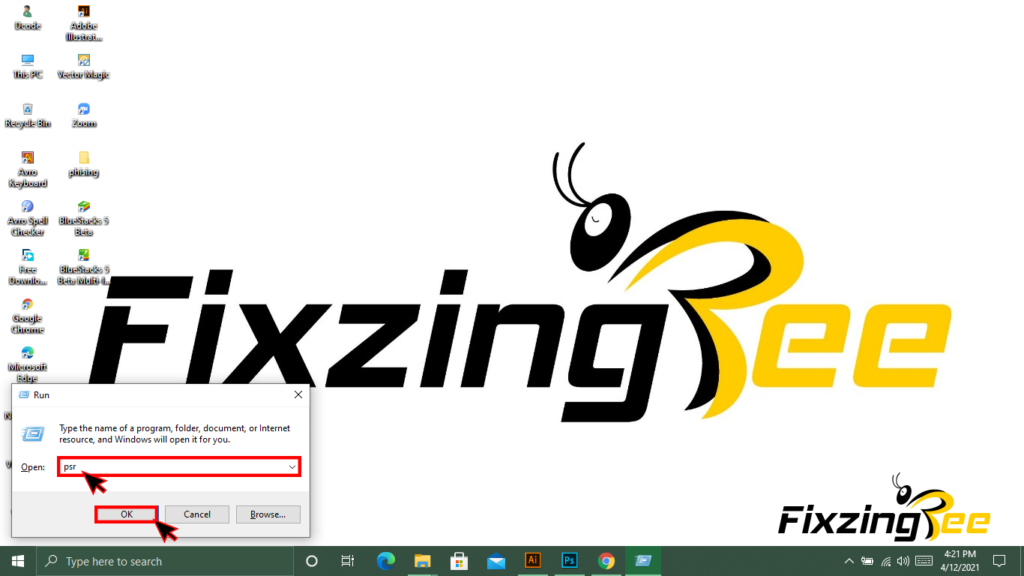
Shortcut keys:- Windows+R 🡲 type “psr” 🡲 click on “Start record” 🡲 stop record and save.
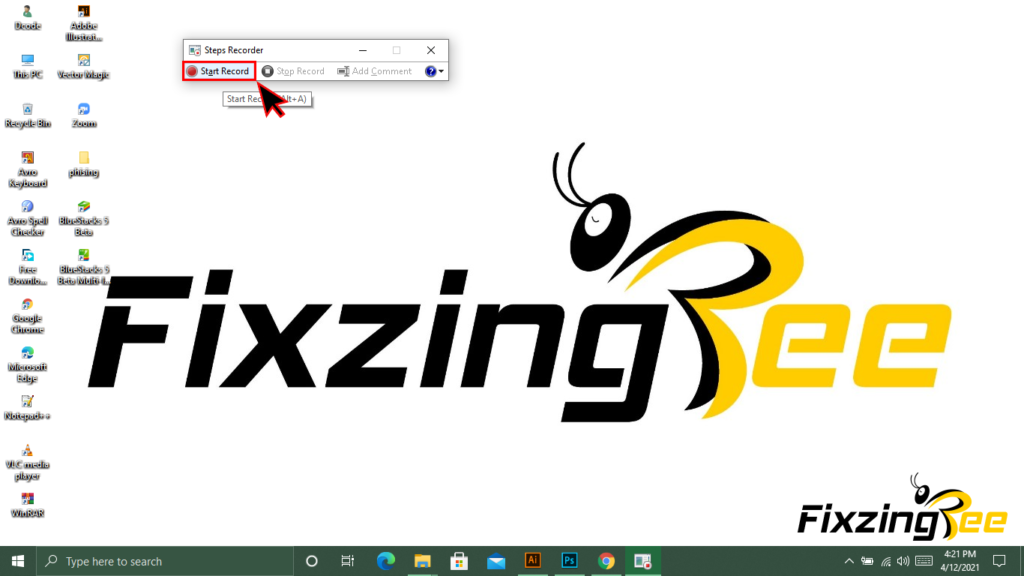
Step 1- Press and hold on the window button then press “R”. Now type “psr” on the run field. Then simply click ok.
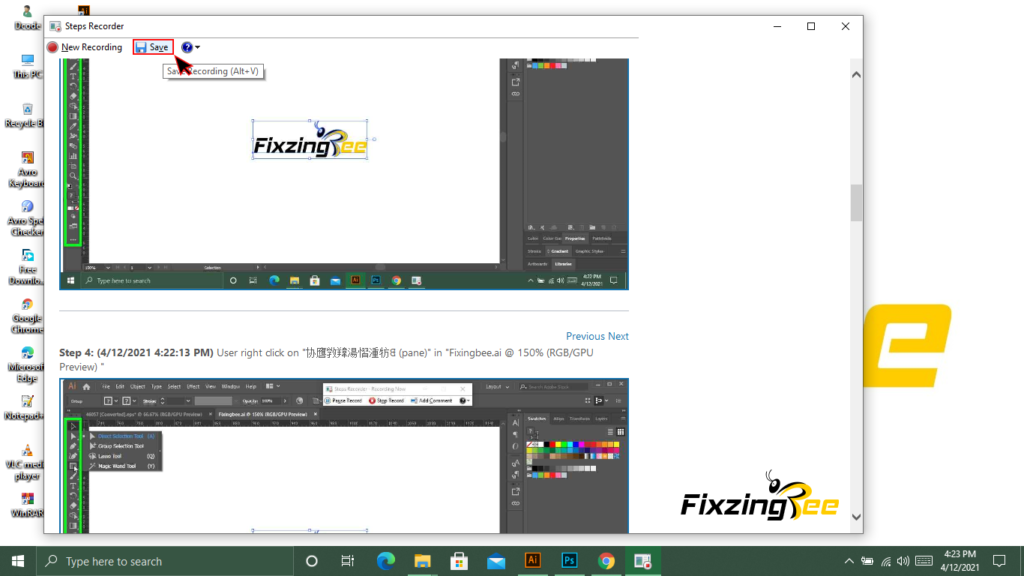
Step 2- Here you see a step recorder option appear on your screen. Select start record. Note: It is not any video graphical recorder. It’s a pictorial screenshot. After selecting the “Start record” button start clicking on your cursor. When you move your cursor one by one action the screenshots will take automatically one by one. Let me clear you. Suppose your friend doesn’t know how to create a Gmail account. So, he/she told you to teach him/her how to create a Gmail account. So then you taking screenshots for each step then sending your friend. This is a pretty wasting of time. That’s why you chose this option to take screenshots for each step and you don’t need to take every step screenshot. Because it’ll take automatically.
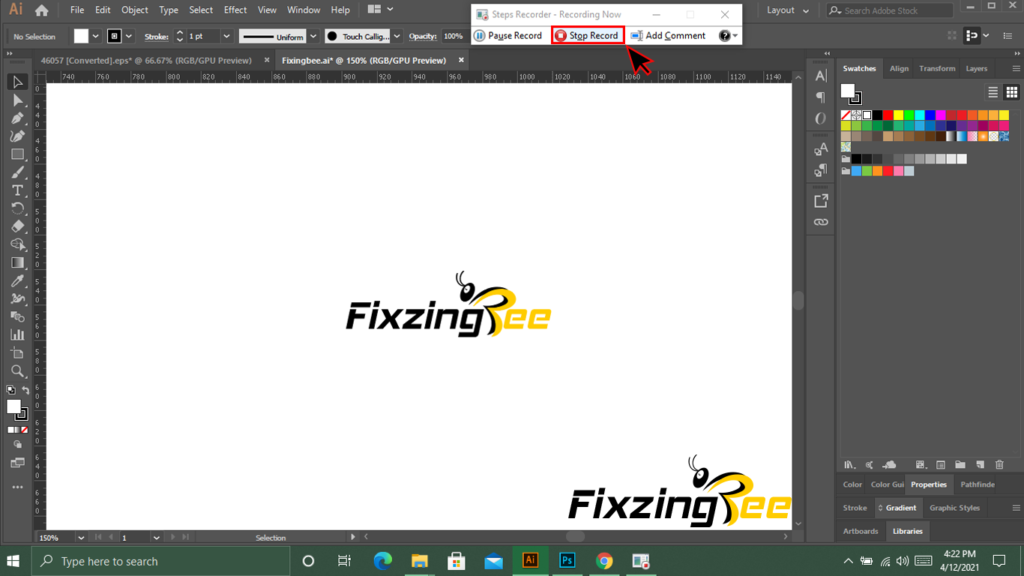
Step 3- After completing your steps then stop the process by clicking on the “Stop Recording” option.
Step 4- Now you have to save the process. The file will save as a zip file. Hope you all know what is a zip file and how to unzip it. You can see the screenshots when you unzip the file.