Want to record the screen on your PC? This article explains how to enable screen recording to record your screen in Windows 10. Using Windows Game Bar or PowerPoint and I will provide more software names. Windows 10 desktop and laptop computer cover instructions.
Despite having many third-party screen-capture applications, Windows and macOS allow you to capture your screen activity thanks to the built-in tools. Windows 10, Max, and even Chrome OS have built-in tools that can make things easier than you think. In this guide, we will show you how to use local, open-source, and third-party payment tools. Here’s how to use all available tools.
How to Use Xbox Game Bar to Screen Record on Windows
Did you know that Windows 10 has a free screen recording utility called Xbox Game Bar? One of the most high-profile features released in the May 2019 update of Windows 10 is the Xbox game bar. Built-in Windows 10, the game bar was created to record games you play directly from your PC or you stream from the Xbox One. However, it can easily capture screen activity from other applications.
It has the ability to record your screen which works well across all Windows 10 applications. However, if you want to capture your screen at the same time, you still need third-party software. The Xbox Game Bar is technically available on all Windows 10 PCs, but won’t work on some devices. Whether you want to capture gameplay or create a tutorial for someone using Microsoft Office.
To make it even easier for you, we’ve outlined a few simple steps on how to record your screen in Windows 10. After you record the selected activity, the generated video is automatically saved as an MP4 file, which can be uploaded wherever you like. Designed to create a more immersive PC gaming experience, it provides a variety of tools for all users via a quick keyboard shortcut.
How to Record Your Screen
The screen recording tool is a part of the Xbox app that is installed by default in Windows 10. The Xbox game bar recently got some big updates to make it more effective, so you can now take screenshots and memes as well. Here’s how to record in Windows 10 using the game bar. If you haven’t already, you need to set up your Windows game bar. After you set it up, follow the steps below.
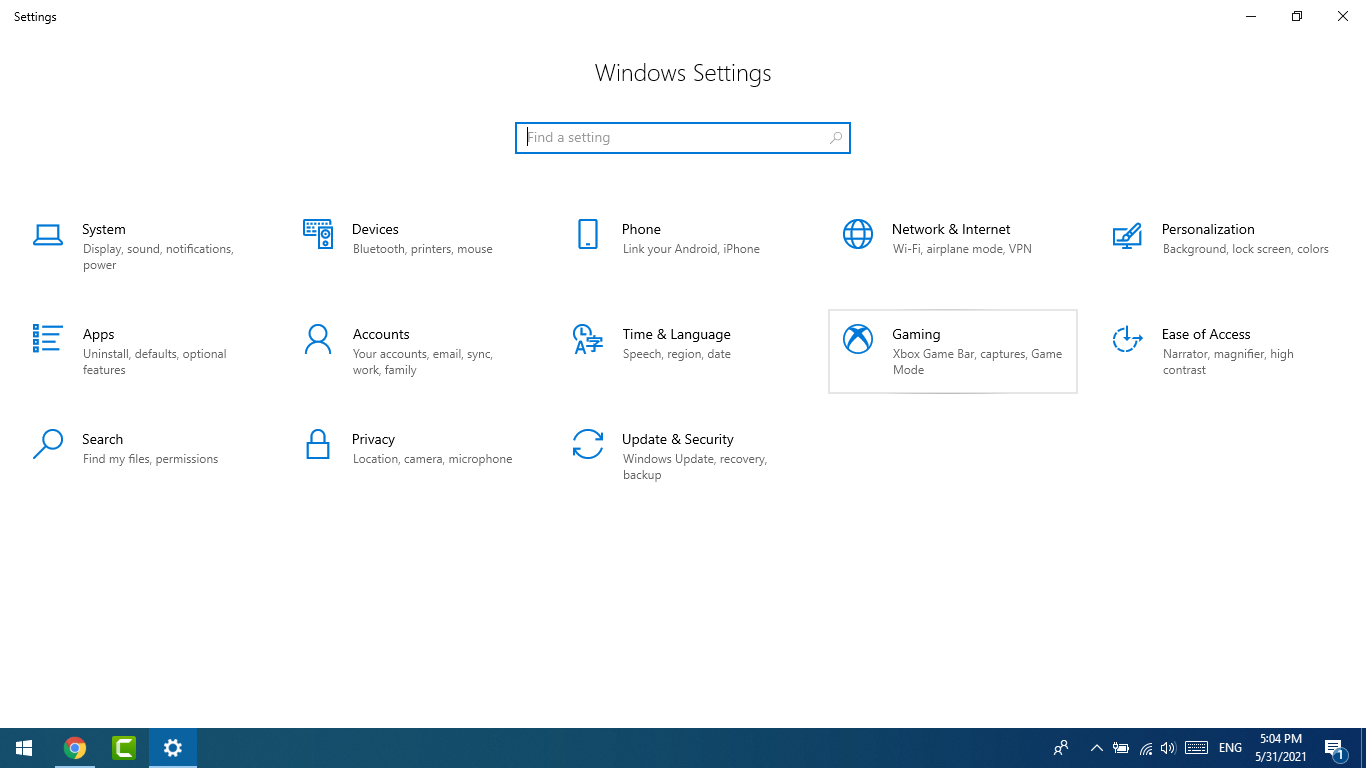
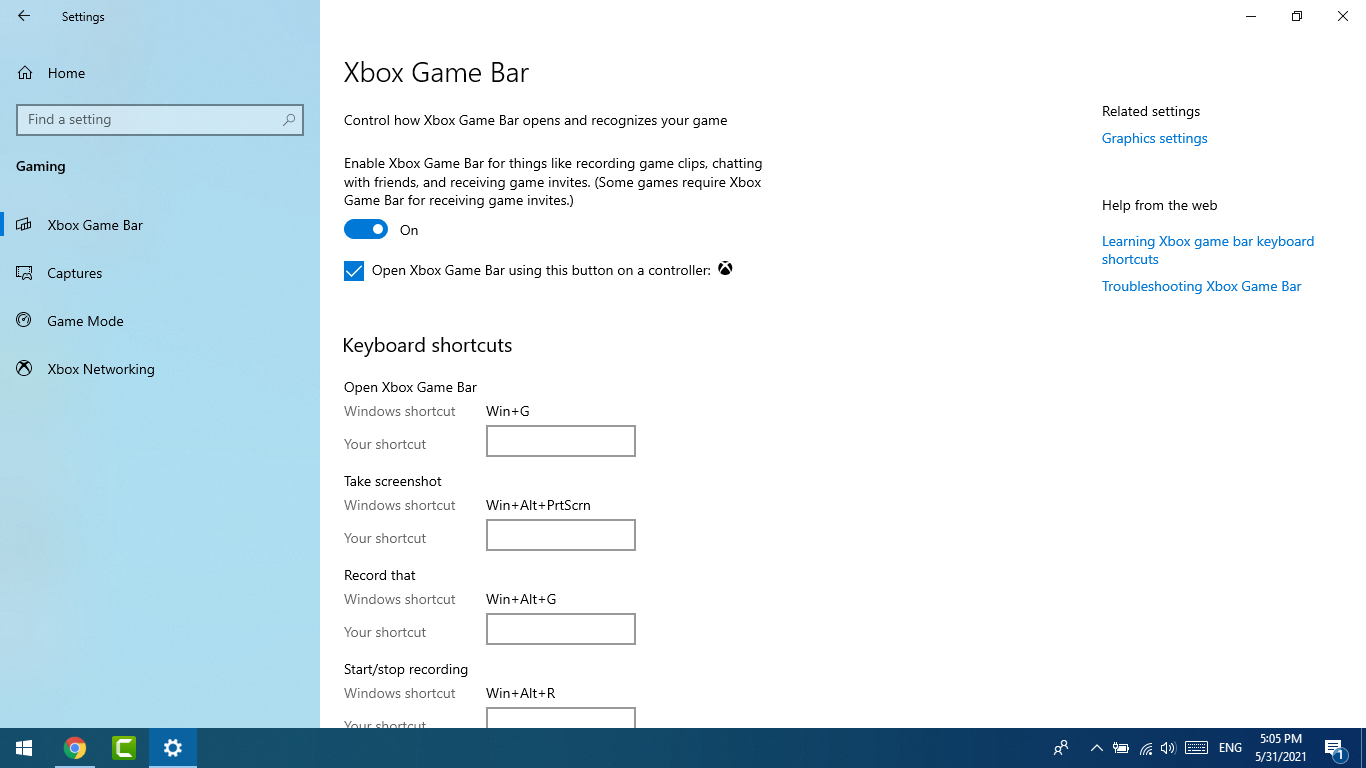
- To set it up, go to Settings> Gaming> Game bar and use the game bar to turn on the switch for recorded game clips, screenshots, and broadcasts.
- Here, you can switch to any keyboard shortcuts related to video recording, and take screenshots as soon as the game bar opens. If you connect an Xbox controller to your PC, you can trigger the game bar by pressing the Xbox button on the controller. Open the app or program you want to record and then press Windows + G on your keyboard. This will open the game bar overlay.
- In Gamebar Overlay you’ll see a number of widgets, including Capture, Audio, Performance, and possibly Xbox Social. Compatible with these widgets, there is a toolbar at the top of the screen, so you can add or remove it at any time. Navigate to the screen you want to record and press
Win + G
to open the game bar.
- Click the record button in the capture widget to capture your screen. Record option in Windows 10 game bar capture widget. When the recording starts, a recorder appears at the top right of the page. Here you can view the recording time, press the stop button (the blue circle with the white square in the middle), or control your microphone. There are options to enable recording when projecting your screen, set the maximum recording length, and adjust your audio settings and video quality settings.
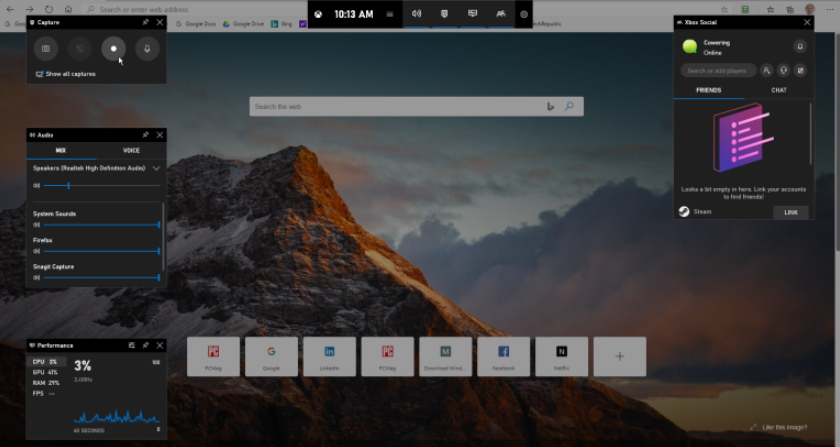
- Several game bar widgets appear on the screen, including screenshot capture, video recording, and audio recording, and controls for broadcasting your screen activities. Check the “Yes, this is a game” checkbox to load the game bar. Whether you are recording a game screen or another app, this method is.
- Click the Start Recording button to capture the activity on your screen. Instead of going through the game bar pane, you simply press
Win + Alt + R
to start your recording.
- Stop recording by clicking on the red recording bar at the top right of the program window. (If it disappears, press Win + G again to bring back the game bar).
When the recording is finished, a notification will tell you that the game clip was recorded. Click the current notification and File Explorer will open the recording location. At this point, you can view the video file or upload it anywhere.
Xbox Game Bar Screen Record Limitations
- When you capture another window that will appear above what you are recording, it will not appear in your recording (but your cursor will be moved).
- Some applications, such as the file manager, cannot be captured with the game bar.
- You can use the Windows Store and applications already installed on your computer.
- Cannot capture your desktop; You must capture an app.
3 Screen Recorder Name

Camtasia
Camtasia is a tool to record and create professional-looking videos on Windows and Mac. Use can use this software for making video tutorials, video lessons, YouTube videos, demo videos, and more.
Features:
Longer or more complex recordings may require further editing. Something like Camtasia will give you a complete built-in video editing suite of tools you can use. Camtasia allows you to increase the video by zooming in on your mouse clicks, text or graphic call-outs, and more. You can record webcam and screen, and presentation. It provides a music and audio library. You can create eye-catching titles and annotations. Camtasia enables you to add Zoom, pan, and animate. You can use transitions between scenes and slides in order to improve video flow. Camtasia enables you to create quizzes. You can add an effect to your video.

Screencast-O-Matic is an easy-to-use screen recorder that enables you to capture any area of your screen. It provides an option to add video from your webcam and narration from your microphone.
Features:
You can animate videos with transitions and overlay effects. It allows you to import videos, images, and audio from other devices. You can show or hide the cursor and webcam. Zoom in or out to highlight a specific area of the video. You can add and edit narration, music, and system audio. You can apply styles to text, shapes, and images.
 Icecream Screen Recorder
Icecream Screen Recorder is a screen recording tool that allows you to record any area of your computer screen. This tool helps you to record Video tutorials, apps and Games, Live streams, Skype calls, Webinars, and more.
Features:
It allows you to choose output quality. You can select the area of the screen or record the full screen. This software helps you to record screens with webcam overlay. You can add text, shapes, and arrows to your screen recording. Icecream apps enable you to record full-screen 3D games. You can record the screen and save it in GIF format. It enables you to add a watermark logo to your screen recording.
OBS Studio for Screen Record
Compatible with Windows 10, 8.1, and 8, as well as Free OBS Studio with MacOS packs a lot of features into one program. Use the program’s floating control panel to start and stop your recording. OBS Studio Screen Recorder
You can stream your video live or switch back to studio mode to add cuts, fades, and other transitions to the video. By the way, OBS Studio Screen can record the activities of your microphone and computer audio, then save the output as an MP4 file.
- High-performance real-time video/audio capturing and mixing. Create scenes made up of multiple sources including window captures, images, text, browser windows, webcams, capture cards, and more.
- Set up an unlimited number of scenes you can switch between seamlessly via custom transitions.
- Intuitive audio mixer with per-source filters such as noise gate, noise suppression, and gain. Take full control with VST plugin support.
- Powerful and easy-to-use configuration options. Add new Sources, duplicate existing ones, and adjust their properties effortlessly.
- Streamlined Settings panel gives you access to a wide array of configuration options to tweak every aspect of your broadcast or recording.
- Modular ‘Dock’ UI allows you to rearrange the layout exactly as you like. You can even pop out each individual Dock to its own window.
Create Professional Productions
- Choose from a number of different and customizable transitions for when you switch between your scenes or add your own stinger video files.
- Set hotkeys for nearly every sort of action, such as switching between scenes, starting/stopping streams or recordings, muting audio sources, push to talk, and more.
- Studio Mode lets you preview your scenes and sources before pushing them live. Adjust your scenes and sources or create new ones and ensure they’re perfect before your viewers ever see them.
- Get a high-level view of your production using the Multiview. Monitor 8 different scenes and easily cue or transition to any of them with merely a single or double click.
[thrive_headline_focus title=”Was this page helpful?” orientation=”center”]