osScreenshots on MacBook:
Whether you want full-screen screenshots or portion shots on your MacBook, you can take any types of screenshots using your MacBook. There are plenty of ways to take screenshots on this apple device. But here we will learn the very basic and easy ways of taking screenshots. This is more like windows shots. If you don’t know how to take screenshots on windows then please Click Here. Sometimes we need to take our laptop or desktop screenshots. You may following the most common way to take your screens screenshots. But the problem is when you going to take specific portions screenshots you filed again and again. The reason is you don’t know how to take a portion of screenshots on MacBook. Maybe you can’t just imagine taking a portion of screenshots. No problem where is the problem here is FixingBee. Let’s start the journey:
The first way of taking MacBook screenshots:
This the most well-known way of taking screenshots on a MacBook using your keyboard. Almost all Mac users know about this method.
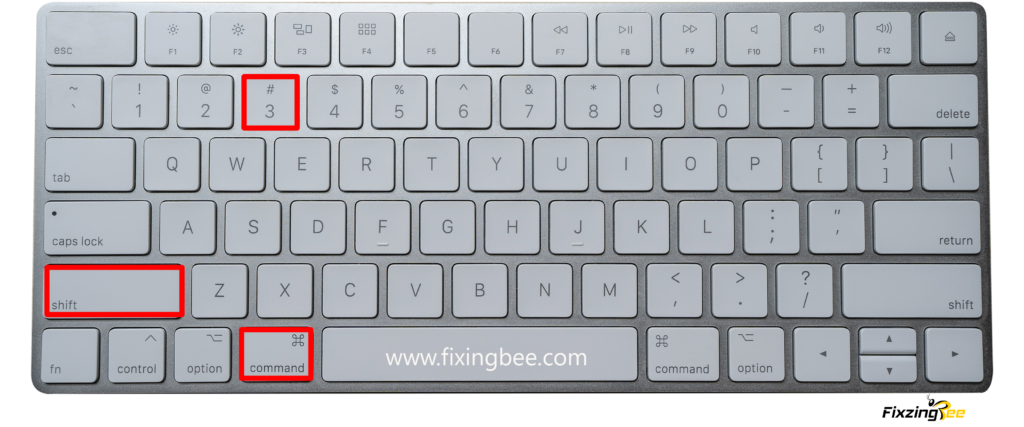
Shortcut keys: Shift ⮕ Command ⮕ 3
To take this full screenshot you have to press and hold on the shift+command button and then you have to press on “3”. This method will capture the screenshot of the whole screen.
The second way of taking screenshots:
The previous method recommends only the whole screenshots of the screen. But sometimes we need specific portions shots. To take portion shots we may take a full screenshot and then crop it. But do you know it reduces the image resolution? Sometimes we need higher resolutions images for different purposes. To eradicate this problem the Apple MacBook offers you to take portion shots.
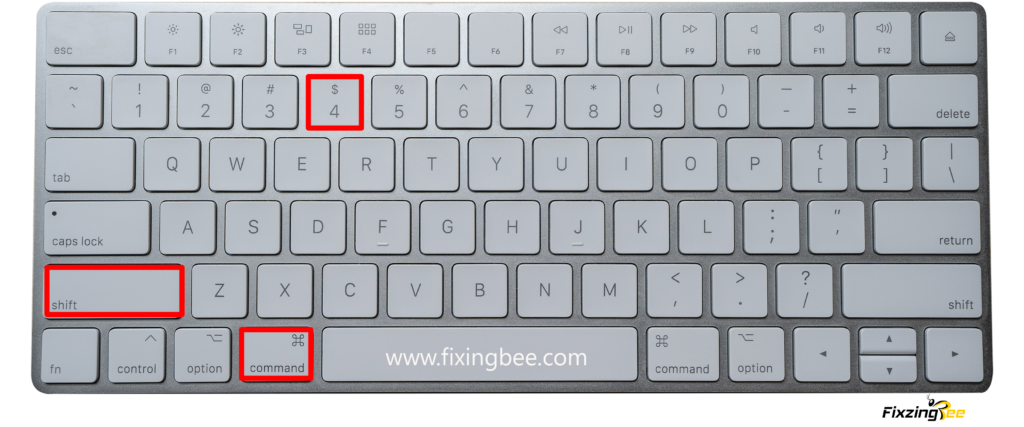
The shortcut keys of taking portion screenshots on MacBook is: Shift ⮕ Command ⮕ 4
This process is too easy. Press the buttons similar to the previous way. Now drag and select the area you wanted to capture. The image will save by default.
The third way of taking screenshots:
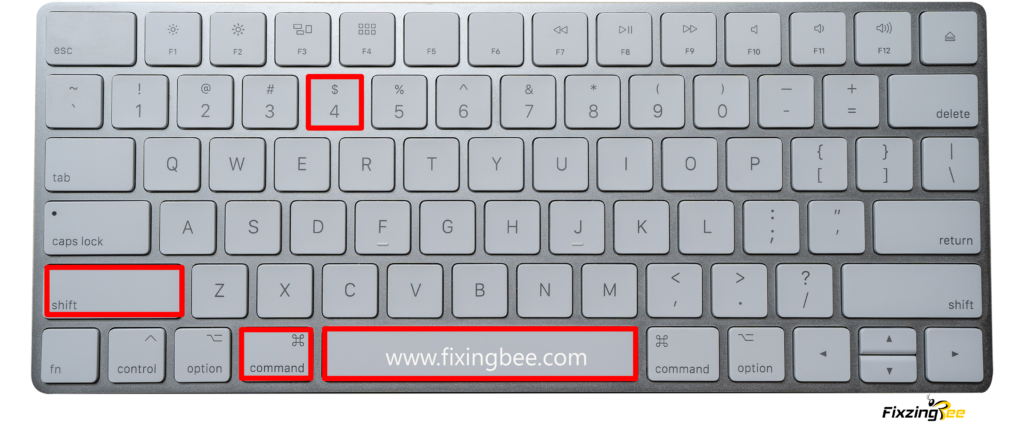
Do you need your windows screenshots? No problem, there is a way to take screenshots of your window on your MacBook. To take a window screenshots of your MacBook simply press and hold the Shift+Command+4 and then press on the Space bar.
Shortcut keys: Shift ⮕ Command ⮕ 4 ⮕ Space bar.
When you press these buttons then you will see that your mouse cursor turns into a camera pointer. Now move the camera (Cursor) over the window or the menu where you want to take a screenshot. When you move either window or the menu you have to look for the highlight to confirm that it’s selected or not. Then click on your mouse right button to take the screenshot.
The third way of taking screenshots:
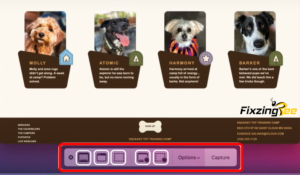
Here comes the coolest way of taking screenshots. I addressed this method as the coolest method because besides screenshots you can record your screen through this method. You can also change your screenshot settings in this method. You can take the screenshots using the screenshot toolbar. You can find it in the window search box by typing “Screenshot toolbar” or using the keyboard.
Here is the keyboard shortcut: Shift ⮕ Command ⮕ 5
To open this screenshot toolbar press and hold your Shift+Command key then press on 5. The toolbar will appear on your screen. Here you will get the all previous method that I talked about. Now here comes the question that if we get all the screenshot methods on the toolbar then why should we use the keyboard keys? Well, opening the screenshot toolbar, again and again, is pretty hardworking and wasting of time.
Now come to the point. Look at the toolbar that I have selected as a red mark. The white marks indicate the screenshots methods according to your preference.